Tag Archives: gluten free lunchboxes

Gluten-free Recipe: Eggplant and Capsicum Pasta Bake

2 Sep

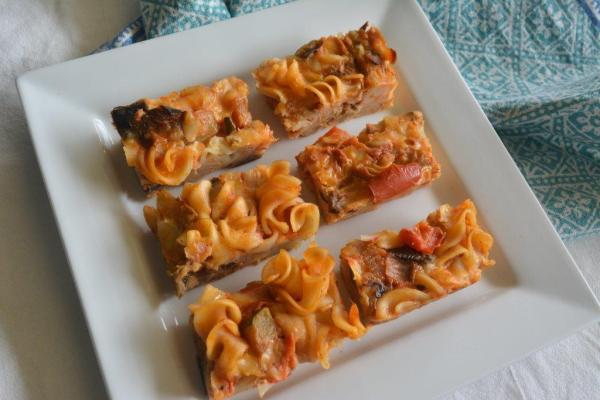
EggplantCapsicum pasta bake

I’ve been in a bit of a vegetable rut over recent months. I tend to favour carrot, zucchini, corn, mushrooms and sweet potato or pumpkin. If you look back over my savoury recipes, you’ll see that I’ve had them on high rotation. So, in the words immortalised by Taylor Swift, I decided to “shake it off” and introduce my kids to a few more veggies. Red capsicum, fennel and eggplant were my choice as I love them, they’re a classic combination and they make a great Italian vegetable stew.

I wasn’t optimistic that the kids would embrace the new tastes and textures, and I was right. They had small tastes of the stew but left it largely untouched. They tried it when I cooked it into a pasta bake, but it will be one of those things that has to be presented to them a number of times before they finally decide  to give it a go.

On the other hand, my Husband and I loved the stew and pasta bake, so if you’re after something for a work lunchbox rather than a kids’ lunchbox, this may be the recipe for you.

The vegetable stew can be served hot, tossed through gluten-free pasta (top with basil and parmesan cheese), or as an accompaniment to grilled or roasted fish or meat. It’s very versatile and once you’ve made the stew, it’s really quick and easy to make the pasta bake. Just be sure to reserve some stew before you serve it up for the evening meal.

Enjoy!

Gluten-free Eggplant and Capsicum Pasta Bake

Ingredients

150 g gluten-free pasta spirals

1 ½ cups Eggplant and Capsicum Stew (see recipe below)

1 cup grated cheese

2 eggs, lightly beaten

Method

Cook pasta spirals according to packet directions. Drain thoroughly and allow to cool a little.

Preheat oven to 180° Celsius (conventional oven) or 160° Celsius (fan-forced oven). Grease and line a square 21 cm baking tray or cake tin.

In a large bowl, combine all ingredients.

Spread evenly into tray and press down with the back of a spoon.

Bake for 30 minutes.

Allow to cool in tray. When completely cool, slice into 3 x 5 cm rectangles.

Makes approximately 28 rectangles.

Eggplant and Capsicum Vegetable Stew

Ingredients

2 tbs oil

1 large onion, peeled and trimmed

250 g fennel

300 g eggplant (approximately 1 large eggplant)

150 g red capsicum, core and seeds removed (approximately 1 medium-sized capsicum)

180 g zucchini (approximately 1 large zucchini)

400 g tin diced tomatoes

375 ml gluten-free liquid chicken or vegetable stock

2 tsp dried oregano

Salt and pepper to taste

Method

Heat a large pot (stock pot) over high heat. Add oil.

Dice the onions into 2 cm chunks. Add to oil, stirring occasionally. Cook for 2 minutes.

Dice fennel, eggplant and capsicum into 2 cm chunks and add to pot. Fry until soft, stirring occasionally.

Add tomatoes, stock and oregano. Bring to the boil and then reduce heat to rapidly simmer for 20 minutes or until most of liquid has evaporated. Add salt and pepper to taste.

Serve immediately as an accompaniment for meat or fish, or stir through pasta.

Makes 6-8 serves, with enough left over for pasta bake.

Gluten-free Recipe: Italian Style Cornbread

6 Aug

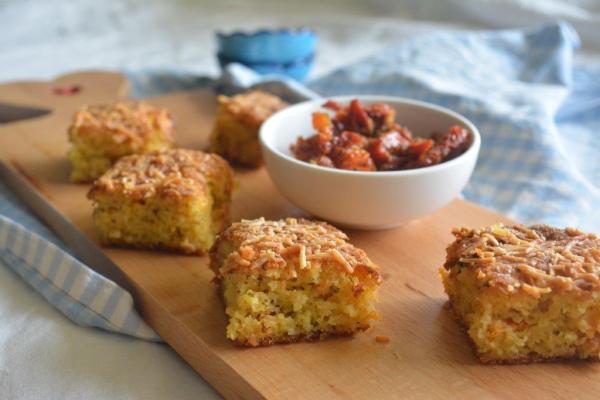
Italian style cornbread

Woop de doop! I’ve stumbled onto something here!

I am just a wee bit of excited about this recipe, especially after lacking inspiration for savoury fare for some time now.

My family loved this cornbread and when I offered it to a friend and her daughter to try, they also loved it. Nothing better than a thumbs up from someone outside the family! The oil gives this slice a lovely crisp crust and the yoghurt makes it moist on the inside. Try stopping at one piece!

When I first attempted it, I used a good quality basil pesto. It tasted amazing, but then I realised that the pesto contained almonds so it couldn’t be sent to school. I couldn’t find a nut-free pesto, so instead used a basil paste and gluten-free garlic salt. (It’s winter here in Australia, so basil is not in season. You could make your own paste, though, by pounding fresh basil leaves and a little olive oil in a mortar and pestle. Or simply use a blender).

If you can find a nut-free pesto, or if nuts aren’t an issue, I’d recommend using 55 grams of basil pesto instead of the basil paste and garlic salt. Otherwise, follow the recipe below and prepare to receive the accolades from all and sundry.

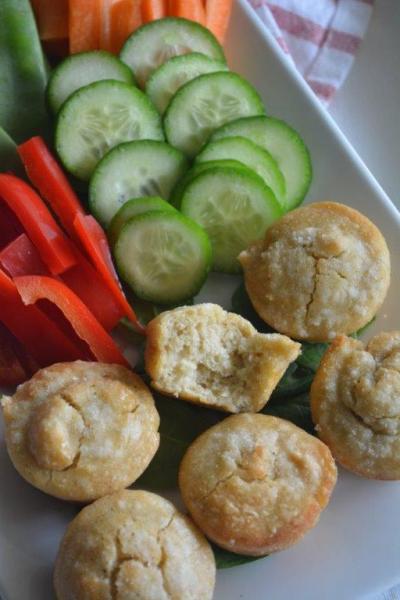
This cornbread is a great option for lunchtime, especially because the yoghurt and cheese really ups the protein content. Send it in the lunchbox with some vegetable sticks and sliced cold meat for a well-balanced lunch.

Enjoy!

Ingredients

100 g fine polenta (uncooked)

30 g tapioca flour

40 g brown rice flour

30 g sorghum flour

5 g psyllium husk

20 g baking powder

50 g grated parmesan cheese, plus 30 g grated parmesan cheese for topping

2 eggs, lightly beaten

200 g plain Greek yoghurt

125 ml oil

40 g basil paste

1½ tsp gluten-free garlic salt

65 g drained and finely chopped sundried tomatoes

Method

Preheat oven to 180° Celsius (conventional oven) or 160° Celsius (fan-forced oven). Grease and line 18 x 28 cm slice tray.

Put polenta in a large bowl and then sift in tapioca flour, brown rice flour, sorghum flour, psyllium husk and baking powder. Stir to combine.

Add 50 g parmesan cheese, eggs, yoghurt, oil, basil paste, garlic salt and sundried tomatoes.

Mix until well combined.

Pour mixture into slice tray. Spread out and smooth over until evenly covering the tray. Sprinkle over remaining 30 g parmesan cheese.

Put in oven and bake for 35 minutes or until a skewer, when inserted, comes out clean.

Allow to cool in tray.

When completely cool, slice into 4 x 4 cm squares.

Makes approximately 28 squares.

It’s a Giveaway!

7 Jul Gluten-free Lunchboxes Cover


Gluten-free Lunchboxes Cover


It’s giveaway time! 

I’m feeling generous, so I’m going to give away my eCookbook to 3 lucky people! It’s filled with great lunchbox recipes, family meal ideas and special occasion treats. All recipes are gluten-free and nut-free and many can be converted to dairy-free as well. It’s also professionally designed and looks absolutely beautiful. I’m so proud of it and would love to share it with you.

To be eligible to win, simply subscribe to my blog by entering your email address in the Subscribe box on the right. Not only will that give you an entry, but you’ll also receive all of my posts by email. That’s right – every new recipe that I post will be delivered straight to your inbox. What’s not to love?

Giveaway closes on Friday 10 July 2015 at 5.00pm, Australian Central Standard time.

Winners will be chosen at random and notified by email.

Winners will be announced in the comments section of this post.

Good luck!

Gluten-free Chicken Noodle Soup

16 Jun

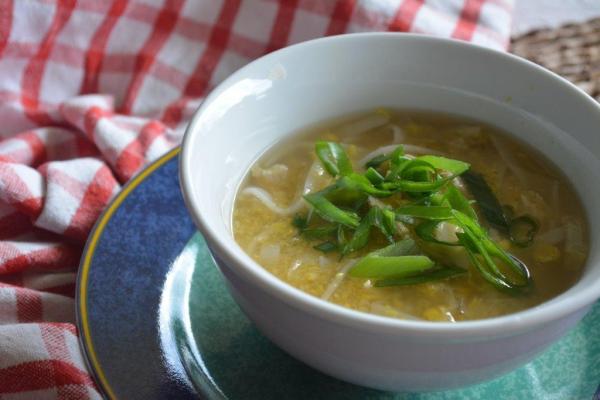
chicken noodle soup

It’s winter here and it’s time to think about warming comfort lunches. There’s nothing worse than soggy sandwiches on a cold day, and nothing better than a warming thermos of soup.

I’m a big fan of chicken noodle soup, so it was only a matter of time before I got around to blogging my own recipe. Also, I’ve needed a quick post for this week as I hurt my back a couple of weeks ago and haven’t been able to stand in the kitchen for very long, which has severely limited my time for inventing. That’s what you get for being virtuous and going to the gym!

You can tell from the photo that I haven’t had time for anything – it’s pretty ordinary, but then again soup is a tricky thing to photograph. Best left to the professionals!

My favourite way of preparing the chicken is to put chicken breasts in the slow cooker, cover with water, and then let them cook on low for six hours or so. They shred like a dream, and you can cook extra to have some top quality cold meat on hand. But if you don’t have time for that, I’ve given you a quick method for poaching the chicken.

Once your chicken’s cooked, the rest is easy to put together. My kids love this soup – it’s great for a quick, light meal and easy to put the leftovers into a thermos for the next day’s lunch.

Enjoy!

Ingredients

1 lean chicken breast fillet

300 g fresh or frozen corn kernels

80 g Pad Thai rice noodles

1 litre good quality gluten-free chicken stock

1 tsp gluten-free Chinese five spice

Salt and pepper to taste

2 tbs greens of sliced sping onions, to garnish (optional)

Method

Halve the chicken breast through the middle, as if to butterfly, but cut it into two separate pieces. Put pieces into a small saucepan and cover with water. Bring to the boil over high heat and allow to boil for 10 minutes.

When chicken is cooked, remove from water and set aside to cool a little. Discard the water. Shred chicken with a fork.

In the meantime, put corn kernels into a microwave safe bowl and cover with boiling water. Cover bowl with a plate or plastic film and microwave on high for 3 minutes. Drain well and purée.

In a large bowl, soak noodles in boiling water for 5 minutes. Drain thoroughly and roughly snip noodles with kitchen scissors.

Put chicken stock into a medium sized saucepan and bring to boil over high heat. Add chicken, corn, noodles, Chinese five spice and salt and pepper to taste. Stir until all ingredients are warmed through.

Serve immediately, garnished with spring onion.

Makes 6 small serves.


Gluten-free and Dairy-free? Read this.

2 Jun

Gluten-free Lunchboxes Cover


If there’s one thing tougher than coming up with ideas for your child’s gluten-free lunchbox, it’s coming up with ideas for your child’s gluten-free AND dairy-free lunchbox.

I mean, seriously, how do you give them a great whack of good nutrition as well as avoid all the things that make them sick? Damn, it’s a tough gig for some parents and kids. Really tough. And you can’t pack nuts if they’re going to be around other kids, so even that’s not an option to ratchet up the nutritional profiles of their lunchboxes.

After I released my eCookbook, I had some enquiries about whether any of the recipes in the book could be made dairy-free. So I did an audit and I’m happy to say that yesiree, folks, with a bit of product substitution here and there, most of the recipes can be adapted to dairy-free.

At the bottom of this post, there’s also some information on soy and corn products, so please read on.

Here’s a breakdown of dairy free options:

Rev it Up – Recess-time chapter 

There are 26 recipes in total.

There are six cookie recipes and all can be made dairy-free with rice milk and/or Nuttelex. Two cookie recipes need dairy-free chocolate or carob buttons (dairy free chocolate is widely available in Australia).

There are four slice (or bar) recipes. One is dairy-free and the others can be made dairy-free with rice milk and/or Nuttelex.

There is one scroll recipe. To make dairy-free, source or make your own gluten-free and dairy-free pastry. I found some recipes on Google if you want to make your own – here and here are just two examples.

There is one ball recipe which is dairy-free and one pikelet recipe which will work with rice milk and Nuttelex.

There are three muffin recipes, one of which is dairy-free, one which will work with dairy-free substitutes and one which can’t be made dairy-free.

The scone recipe may work with dairy-free substitutes.

There are 7 cake recipes. One is dairy-free, four can be made dairy-free with rice milk and/or Nuttelex. Two others cannot be made dairy-free.

Of the 26 recipes in this chapter, there are about 5 that cannot be made dairy-free.

Change it up – Lunchtime chapter

There are 13 recipes in total, three of which are already dairy-free and one which cannot be made dairy-free.

Seven recipes use cheese. In two of the recipes, you can use goat’s feta cheese instead of cow’s feta cheese. Where cheddar or parmesan is used, omit and add extra salt and maybe a small amount of extra flour to balance the consistency. These recipes use cow’s milk but rice milk can be directly substituted. 2 recipes use yoghurt as well as milk and cheese. You can try using extra milk in place of the yoghurt, or use a soy yoghurt. Omit the cheese.

Two recipes use gluten-free pastry. You would need to source or make a gluten-free dairy-free pastry to make these recipes (see links above).

Serve it up – Tabletop to Lunchbox chapter

This chapter gives recipes for family meals and then shows you how to repurpose the leftovers for the lunchbox.

There are 17 recipes in total. Five are already dairy-free and two can’t be adapted to dairy-free. Eight can be made dairy-free by leaving out the cheese and adding salt.

Two recipes use gluten-free pastry. You would need to find a gluten-free dairy-free pastry (or recipe) to make these recipes (see links above).

Four recipes use milk. Rice milk can be used as a substitute in the same quantities.

Live it up – Special Occasions chapter

There are six recipes in total and four of those cannot be made dairy-free.

One recipe may be made dairy-free with Nuttelex and rice milk, although the recipe also uses cream. You would have to experiment with extra milk or soy yoghurt to see if it will work.

One recipe may be made dairy-free with Nuttelex and rice milk, if you can find dairy-free white chocolate buttons

Soy Products

Some recipes in the ebook use soy sauce. If soy is a problem for you or your family, simply replace it with an Asian sauce that is suitable.

None of the recipes use soy flour or tofu. When using yoghurt, I use cow’s yoghurt. If you use soy yoghurt as a substitute, you will need to be aware of any soy intolerances or allergies.

For further information on soy allergies, click here.

Corn Products

Some people with gluten intolerances also have issues with corn.

Some of the savoury recipes use corn kernels. They can be substituted with peas if necessary.

A couple of recipes use polenta. Try using rice crumbs instead.

Xanthan gum is a frequently used ingredient in gluten-free baking, derived from corn and usually genetically modified. It is said to mimic the elasticity that gluten gives to baked goods. Where elasticity is required in the baked goods in my ebook, I use Pixie Dust, a creation of Dr Jean Layton, the Gluten Free Doctor. It is a seed mix that is simple and easy to make and can be stored in the freezer. It’s full of fantastic nutrients and I think it gives a superior quality to gluten-free baked goods. A recipe for Pixie Dust has been reproduced in the ebook (with Dr Layton’s kind permission). Xanthan gum measurements are given as an alternative to Pixie Dust.

That’s it for this post, folks! I hope that’s useful to you. Happy cooking!


Gluten-free Hummus Damper Bites

25 May

Hummus Damper Bites

Well, this recipe has had me stumped for quite some time. I originally imagined it as some lovely damper mini-loaves made with crushed chickpeas, tahini and garlic salt. They were going to be just fantastic … except that they didn’t actually work.

So I tinkered for a while, but got sick of the stockpile of crumbling mini-loaves so I gave it away.

But it has niggled at me, because the idea should have worked, damn it.

I’ve had my fair share of disasters just recently – another recipe I’d been working on for a long time was a failure again and again so I turned the remnants into Cake Balls. I have to say, the good thing about the failure is that I worked out how to salvage something out of it. Always a bonus when the ingredients are just a wee bit expensive!

I eventually came back to this recipe, determined to get it working and decided to use a store-bought hummus instead of chickpeas and tahini. The thing is, the recipe was looking more and more involved and further away from the original concept of easy lunchbox baking.

So I recommend using a good quality, gluten-free, store-bought hummus, unless you regularly keep the homemade variety in your fridge. Homemade hummus is certainly on my to-do list- my kids love it and I’m sure they would dive headfirst into a vat of the stuff given half a chance.

But here’s the really big news – I’ve realised that there is a wonder miracle ingredient for gluten-free baking, and it works like a charm in this recipe. It’s an easy to find, common ingredient. Yoghurt. Yes, that’s right. Plain Greek yoghurt.

It’s amazing the way it locks moisture into a cake or muffin and the less fruit or vegetables you use in your baked goods, the more you will need something else to keep things moist and spongy. Yoghurt is it. I don’t know why it works better than cream, for example, but it does. I’ll have to conduct my own scientific enquiry into this. One day. One day when I also have time to watch TV without folding the washing, one day when I have time to paint my toenails and apply moisturiser to my legs….. Oh, wait. Off track and too much information.

Anyway, these little bites could easily be a savoury recess time snack, but I’ve been packing them for lunch, along with some cooked chicken breast and vegetable sticks. And they freeze and defrost like a dream. And most importantly, the kids love ’em.

Enjoy!

Ingredients

2 eggs

60 g tapioca flour

80 g brown rice flour

80 g sorghum flour

5 g psyllium husk

15 g baking powder

1 tsp gluten-free garlic salt

135 g gluten-free store-bought hummus

125 ml oil

140 g plain Greek yoghurt

70 ml milk

Method

Preheat oven to 180° Celsius (conventional oven) or 160° Celsius (fan-forced oven). Grease and line 24 cavities in a 25 ml capacity mini-muffin tray.

Beat eggs in the large bowl of an electric mixer, on medium speed for 5 minutes.

Sift into the bowl the tapioca flour, brown rice flour, sorghum flour, psyllium husk, baking powder and ½ teaspoon of the garlic salt. Add the hummus, oil, yoghurt and milk. Mix until well-combined.

Spoon mixture into cavities until three-quarters full. Sprinkle a little of the remaining garlic salt over each Bite.

Bake for 20 minutes.

Makes 24.


Rescue from the wreckage: Gluten free Cake Balls

9 May


Gluten-free Cake Balls

Gluten-free Cake Balls

Oh, damn. Damn, damn, DAMN!

Insert multiple expletives here. Oh, $%&*#@$*!!!!!!!

This is why I’m swearing. I had this idea for a GORGEOUS recipe. Orange and blueberry loaf. Sounds divine, doesn’t it? Wholesome and comforting.

Well, it didn’t work as a loaf, so I tweaked the recipe and then made it as muffins. Still didn’t work, so I tweaked again and made them into mini-muffins. Didn’t work once. Didn’t work twice. Didn’t work thrice. … and so on.

And damn it, I’m so convinced that it should work. I just haven’t found the missing link. But these little babies are so fragile that they just about explode in your hand as soon as you pick them up. And let me be clear here – they don’t just fall apart, they shatter into a zillion crumbs. You might be able to tell from the picture above. So I’m not blogging that recipe. Not yet, anyway.

Gluten-free ingredients ain’t the cheapest, folks, especially with a handful of frozen blueberries thrown in, and I just can’t bear wasting food, so what to do?

Well, I decided to salvage something from the train-wreck.

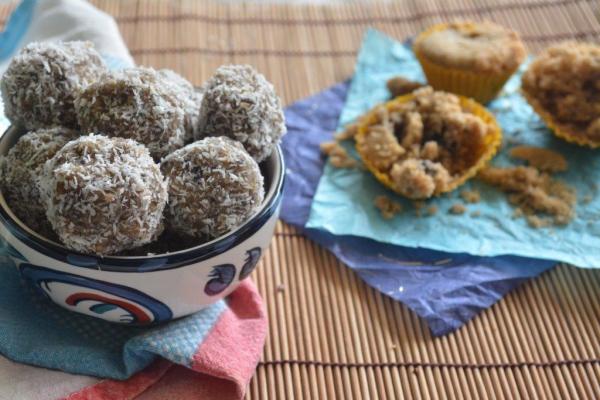
When you have a cake or muffin disaster – when the cake’s too dry, falls apart, burns or crumbles, here’s what to do. Take the (non-burned) bits of cake and process them into crumbs, then add a few ingredients to make cake balls. You’ll get the flavour of the cake, repackaged into something that can go into the lunchbox and can also be frozen. These cake balls were fairly unattractive – the blueberries made them a fairly icky grey colour – so I rolled them in coconut as well. That disguised the colour enough to tempt the kids and my Hubby and everyone gave it the thumbs up.

Because I’ve attempted this recipe a number of times, I’ve got loads of these crumbs in the freezer – I weighed them into 100 gram batches and put them into small snap-lock bags. I can defrost and use them whenever. And here’s another idea – for a quick dessert, make some custard (for a recipe, check out the Bread and Butter Puddings recipe in my eCookbook), gently fry some of the crumbs in butter and then sprinkle over the warm custard. Yum!

And, oh yeah, I know I’m on a bit of a theme with balls at the moment, but y’know. When you’re on a good thing …

Enjoy!

Ingredients

500 g gluten-free cake or muffin crumbs

2 tbs melted coconut oil

100 g desiccated coconut

50 g desiccated coconut, extra, for rolling

Method

In a large bowl, combine crumbs, coconut oil and 100 g desiccated coconut. Mixture should press together firmly without any excess liquid.

Roll dessert-spoonfuls of the mixture into balls. Put 50 g desiccated coconut into a bowl and roll the balls in the coconut.

Refrigerate until ready to serve.

Makes approximately 40 balls.

Gluten-free Fried Rice

1 May

Fried Rice

Here in Australia, we are two thirds of the way through Autumn and the chill of winter is setting in before its time. It’s got me thinking about comfort food and food to send to school warmed in thermoses.

Pretty soon I’ll be making big pots of soup. The slow cooker’s already getting a good workout with lovely warming casseroles.

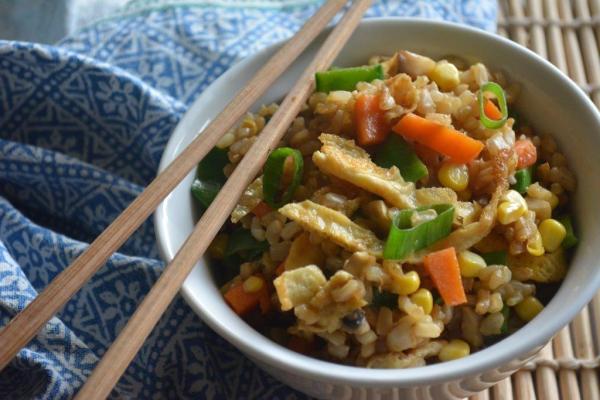
Looking back on my recent lunchtime recipes, it appears that I’m in a bit of a rice theme. There’s the Sushi Squares and the Pumpkin and Rice Salad. If I’d made them a series (“Here’s the latest in my series of rice recipes…”), maybe it wouldn’t look so much like I’m stuck in a rut! But I am and one of the reasons is that I tend to keep cooked brown rice on hand in the fridge. It’s a good quality, high fibre carbohydrate, so it’s a great choice for me when I’m in a hurry. Brown rice and lean cooked chicken breast are my fast foods of choice.

The fantastic thing about fried rice is that you can put just about anything in it. Whatever you have in the fridge. Really! If your little one has an egg allergy, or you are looking for another protein, try tossing through some lean cooked chicken breast. You can poach a chicken breast by putting it in a saucepan, covering with water and boiling for about 15 minutes. You can then shred it with a fork.

For best results, it’s a good idea to cook the rice the day before, or at least a few hours before, you need it.

The other thing I love about this recipe is that it’s great to send to school warmed in a thermos, but would also be just fine served cold. That makes it a year-round lunchbox choice.

This recipe will make 4 serves as a light meal or as a meal accompaniment. If you want a more substantial meal with leftovers for lunchboxes, simply double the quantities.

Enjoy!

Ingredients

2 cups cooked brown rice (cook according to packet directions)

2 tbs oil

2 eggs, lightly beaten

1 large carrot, peeled, trimmed and finely diced

2 large mushrooms, diced

Fresh kernels from 1 cob of corn (or ¾ cup frozen or canned corn kernels)

8 snow peas, trimmed and sliced

1 spring onion, thinly sliced

2 tbs tamari or gluten-free soy sauce

Method

Rinse the cooked rice in a sieve to remove any starch. Drain thoroughly and allow to completely cool.

Heat 1 tbs of the oil in a large frypan over medium-high heat. Pour the eggs into the pan and allow to spread to form a thin omelette. Cook for two minutes on each side and then remove from pan and set aside.

Add carrot, mushrooms, corn and snow peas and cook, stirring occasionally, for approximately 10 minutes or until starting to soften.

Add the remaining oil and the rice. Stir to combine with other ingredients. Stir occasionally.

In the meantime, roll up the omelette and thinly slice into strips. Add to the pan, along with spring onions and tamari (or soy sauce). Stir to combine. Cook for two minutes, stirring occasionally.

Serve immediately.

Makes 4 small serves.

Gluten-free Carrot and Pea Fritters

20 Apr

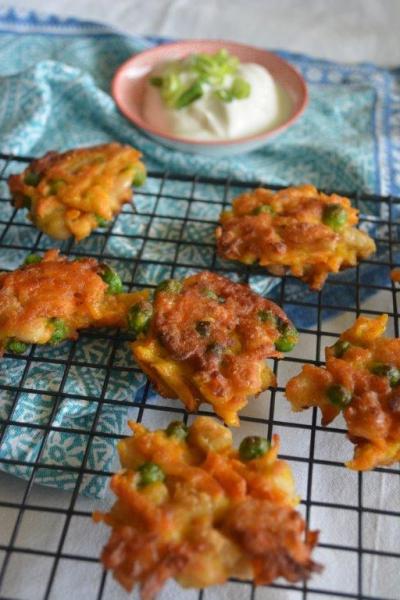
Carrot Pea Fritters 2

When my two eldest children were little, both were very picky eaters. I used to struggle to get them to eat any vegetables at all, and meat also caused all sorts of issues. I resorted to all sorts of tricks, including serving their food up in a container with a lid, asking “What’s in there?” and then whipping the lid off with a dramatic flourish. It was always greeted with lots of giggles, and then the usual battle would begin.

My eldest actually developed a liking for frozen peas and corn. Strange, I know, but whatever works, right? It didn’t really matter whether she liked her veggies warm or frozen, so long as she ate them. My middle daughter was a far tougher customer until she was diagnosed with Coeliac Disease, when everything improved dramatically.

One of the really big issues that I had with their fussiness was the food wastage. I couldn’t bear it. But once I worked out that they both seemed to enjoy my cheesy corn fritters (the recipe is in my eCookbook), I had a plan. The base of the recipe is two eggs and flour. So if they didn’t eat their meals one night, I’d take  the leftovers and roughly mash them, stir in some grated cheese, beaten eggs and flour. Then I’d drop spoonfuls of the mixture into a frypan and before too long, I’d have crisp, golden fritters.

Every time I served them, the kids ate them. Needless to say, fritters occupy a particularly special place in my heart. They saved my sanity many a time.

My kids still love the cheesy corn fritters – I serve them up every now and again as a light meal, with a tossed salad to accompany. I always make sure I’ve set some aside for the next day’s lunchboxes as well.

It’s been an awfully long time since I’ve come up with a new fritter recipe, so I thought I’d give it a whirl this week. It’s a simple recipe, which is always a good thing! I’ve used ground coriander and cumin seeds for a mild flavouring, but if you think your kids won’t tolerate that, use some sweeter spices such as nutmeg or cinnamon. Or no spices at all. I’ve also included cannellini beans to boost protein and carbohydrates – to keep them full for longer and for energy.

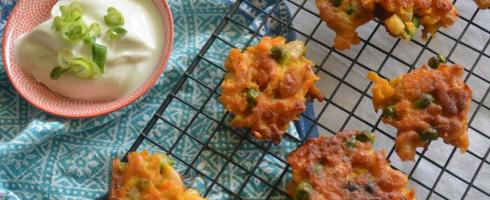
These are great as a light meal, or for finger food (serve with natural yoghurt with  a little fresh mint or chopped spring onions stirred through). The next day, send them to school for lunch.

Enjoy!

Ingredients

250 g (approximately 4) peeled and trimmed carrots

100 g fresh or frozen peas

400 g can cannellini beans, rinsed and drained

½ tsp ground coriander seeds

½ tsp ground cumin seeds

½ cup gluten-free plain flour

2 eggs, lightly beaten

1 tbs milk

Generous pinch of salt

Oil, for frying

Method

Grate the carrots using a coarse grater.

Put all ingredients into a large bowl and mix until well combined.

Heat a large frypan on medium heat. Pour in enough oil to generously cover the base of the pan.

Drop heaped dessert spoonfuls of the mixture into the pan, allowing room for spreading. Fry for approximately 10 minutes or until golden brown. Turn fritters and fry for a further 5 minutes or until cooked through and golden brown.

Drain on a wire rack and serve.

Makes approximately 24 fritters.

Gluten-free Blueberry Coconut Cookies

11 Apr

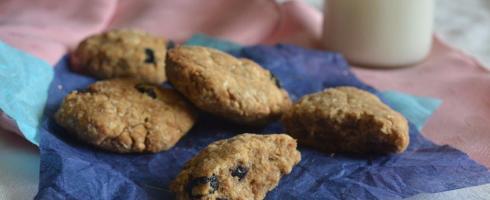
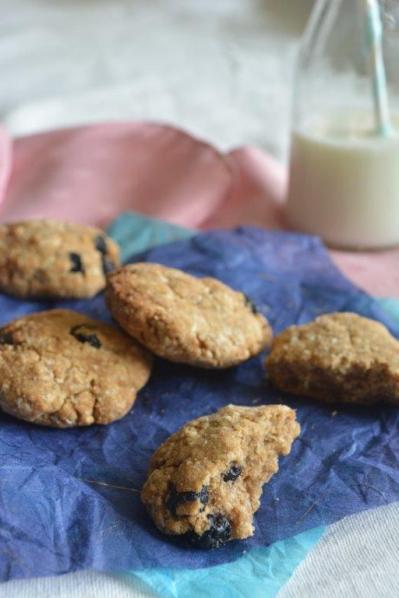
Blueberry Coconut Cookies 2


Well, I’ll be the first to admit that I struggle to make attractive-looking cookies. They usually taste great, but their appearance leaves a bit to be desired.

When I was photographing these cookies earlier today, I had three little helpers surrounding me telling me how to make them look better. I don’t think their advice really helped – there was a fair amount of styling and light manipulation going on to try and detract from the ordinariness of the cookies!

So you’ll just have to take my word for it. They are yummy – the dried blueberries really give them a lift. I used coconut sugar in this recipe, but do a direct swap for brown sugar if you can’t get your hands on any of the coconut variety. I was interested in layering the coconut flavours – coconut flour, coconut sugar and desiccated coconut – a little like a Sarah Lee creation (“Layer upon layer upon layer…”)!

After reading this post by Gluten-free Girl, I was interested to know whether my cookies would turn out better if I rested the dough in the fridge overnight. I did it twice and both times the dough became crumbly, as described by Gluten-free Girl, yet the mixture came together really well and cooked nicely. I didn’t test a batch of cookies without resting the dough, so I can’t comment on the extent to which it improved. But I can say that the baking process was much easier and quicker when I knew that I only had to whip up the dough on one night. The cookies could be rolled and baked the next day in a flash. I’m all for doing things quickly and easily, so I have no problems with dividing the baking process by resting the dough.

But if you need the cookies then and there, by all means skip the resting stage and roll and bake them immediately.

These cookies can be used  for a recess-time refuel. I’ve got a batch in the freezer for quick and easy school lunchboxes once we’re back from school holidays.

Enjoy!

Ingredients

40 g tapioca flour

40 g coconut flour

130 g brown rice flour

5 g psyllium husk

70 g coconut sugar (or brown sugar)

30 g desiccated coconut

2 eggs, lightly beaten

100 g butter, melted

1 tsp vanilla essence

70 g dried blueberries

Method

Preheat oven to 180° Celsius (conventional oven) or 160° Celsius (fan-forced oven). Grease and line a large baking sheet or cookie tray.

Into a large bowl, sift tapioca flour, coconut flour and brown rice flour. Add psyllium husk, coconut sugar and desiccated coconut. Stir to combine.

Make a well in the centre of the mixture and add eggs, butter, vanilla essence and blueberries.

Mix until combined. Cover bowl with plastic film and refrigerate overnight, or for at least 4 hours.

Remove bowl from refrigerator and microwave for 20 to 30 seconds to loosen the mixture.

Press the mixture together and roll into dessertspoon-sized balls. Flatten between the palms of your hands and place on tray, allowing room for spreading.

Bake for 20 minutes.

Makes 16.