Tag Archives: celiac lunchbox

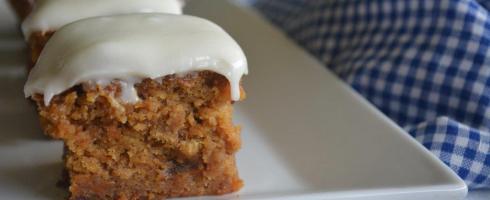
Gluten-free Recipe: Pine+Apple Cake with Maple Icing

20 Oct

pine+apple cake 2

I can’t think of anything meaningful to say this week, so instead here are three random and unrelated facts about me:

  1. My 5 year-old son and I are making a pompom. That is, I’m making the pom pom while he gets the wool nicely tangled and strewn up everywhere. It’s for a kindy project – all the kindy kids’ pompoms are going to be hung from a tree. It should look amazing. They’re so easy to make, thank God, as my craft skills would barely cope with anything else. Previous parents were asked to knit squares for a blanket. Jeez, that would have been my worst nightmare. My poor Mum tried to teach me to knit but I was just so hopeless at it. She blamed it on my severe left-handedness. I blamed it on lack of talent. To this day, I think she considers it a parental failing that I can’t knit. Time to let that one go, Mum!
  2. Thanks to the recommendation of a good friend, my Husband and I are currently watching Studio 60 on the Sunset Strip, created and written by Aaron Sorkin. Damn, it’s good. I love Sorkin’s work. I really loved The Newsroom and earlier this year I did manage to work my way through one season of The West Wing – still fab after all this time. I don’t think I’ll rest until I’ve watched everything Sorkin has ever done. He’s a genius.
  3. We are in the middle of spring here in Australia and that means that everyone’s having garage sales and all the schools are having fundraising fairs or fetes. That means loads of second-hand goods. That means plenty of opportunities to buy props for food photos, as well as kids’ clothes and toys. I love a bargain, so this makes me happy. I love a bargain so much that I’m thinking about blogging my food prop purchases. What do you think? If you love a bargain as much as me, check out the lovely blog The Second Hand City, especially if you live in Melbourne. It’s wonderful for glimpses of how its author, Leanne, finds and uses her recycled treasures.

That’s all. But I should just say that this recipe is awesome. And I think its name is awesome, too (pineapple plus apple equals pine+apple. Geddit?). So you can either choose to bask in its awesomeness by cooking it, or not.

Oh, and yes, occasionally I allow my kids to have iced cakes at school. Gotta be healthy most of the time, but gotta live as well. And honestly, you are really going to want to try the maple icing.

Enjoy!

Method

Cake

2 eggs

150 g brown sugar

50 g tapioca flour

70 g sorghum flour

60 g brown rice flour

30 g baking powder

5 g psyllium husks

200 g (approximately 2)  peeled, cored and grated apple

120 g (approximately 3 rings) drained tinned pineapple

125 ml oil

Icing

45 g butter, melted

1 ½ tbs pure maple syrup

100 g gluten-free icing mixture

Method

Preheat oven to 180° Celsius (conventional oven) or 160° Celsius (fan-forced oven). Grease a 24 cm fluted ring cake tin.

Beat eggs in the large bowl of an electric mixer on medium speed for 5 minutes. Add sugar and beat for a further 2 minutes.

Sift in tapioca flour, sorghum flour, brown rice flour, baking powder and psyllium husks. Add apple.

Chop the pineapple into 1 cm chunks and add to the mixture. Add oil.

Mix until well combined.

Pour into tin and make sure mixture is evenly disbursed. Bake for 35-40 minutes or until a skewer, when inserted, comes out clean.

Allow to cool in tin.

When cake is completely cooled, turn out onto a plate.

To make the icing, put the butter in a small bowl and cover with a plate or plastic film. Microwave on high for 30 seconds or until butter is melted.

Sift icing mixture into a medium sized bowl and add maple syrup. Add butter and stir to combine. Spread evenly over cake and stand for a few minutes to set.

Makes 8 to 10 slices.


Reminiscing

21 Aug

Corn fritters 2

To be perfectly honest, I’m not in the mood for blogging this week. The end of winter has me feeling a little bit blah. One of my kids is sick, I’m a bit sleep deprived and, well, feeling blah. Blah blah blah. Rather than writing this post, I’d much prefer to be curled up on the sofa watching old episodes of ER (you know, the ones with Dr Ross, Dr Green, Dr Carter …).

So I thought I’d do a super-quick post looking back at the first recipe I ever posted on this blog, unbelievably almost 3 years ago.

They’re cheesy corn fritters. The photo above is a reshoot of the original, using a DSLR camera, and the recipe is now available in my eCookbook. Take a look the photos below – I had no clue how to shoot food, no clue about light and alternating between an old point and press digital camera, a camcorder and my iPhone4. Here’s my first attempt:

Cheesy Corn Fritters

Yowzers! It’s a mash-up of yellow! Then I tried again:

122

Marginally better but still not looking too fetching. If you ever wondered how much difference a DSLR camera and some photography lessons really make, the proof is in these pictures. At the very least, you can see what the fritters are actually meant to look like!

This recipe remains a firm family favourite – in the warmer months, they are great for a light meal. I cook up a double batch, serve with a salad, and then send the cold leftovers in the next day’s lunchbox. They also make a great finger food option or even for when you need a plate of nibbles to share.

[su_button url=”http://www.glutenfreelunchboxes.com/shop/” target=”blank” style=”flat” background=”#e659ae” color=”#ffffff” size=”7″ wide=”yes” center=”yes” radius=”round”]Gluten-free Lunchboxes eCookbook – Shop Now![/su_button]

Gluten-free Recipe: Moroccan Carrot Cake

12 Aug

moroccan carrot cake

I’ve been more than a little obsessed with gluten-free carrot cake ever GF and Me, one of my favourite food blogs, posted their recipe for Spiced Carrot Cake. It’s gluten-free and dairy free, but it was the picture of the cake that really intrigued me. Click through to see how beatifully moist that cake is. OMG. And what’s more, it’s got pineapple in it and coconut flour. A taste sensation!

Well, I just had to make it. And it was amazing so I blogged the result.

Since discovering that recipe, I’ve not had any interest in developing a carrot cake recipe until recently, when I started to think about Moroccan flavours and how well they would work in a carrot cake.

I tinkered with this recipe for a while and was really pleased with the results. The carrots, dates, honey and spices really work beautifully together and they make the texture moist and strong.  A lovely recess-time treat.

My recent recipes look a food tour of the world – Vietnamese cold rolls, Italian style Cornbread and now Morocco. I might keep going to see what other cultural delights await.

Enjoy!

Ingredients

Cake

2 eggs

250 g dates

50 g tapioca flour

70 g sorghum flour

60 g brown rice flour

30 g baking powder

1 tsp ground cinnamon

5 g psyllium husks

110 g brown sugar

320 g peeled and trimmed carrots, grated

1 ½ tbs honey

125 ml oil

125 ml milk

Icing

70 g ricotta cheese

1 tsp honey

250 g gluten-free icing mixture

2 tsp milk

Method

Preheat oven to 180° Celsius (conventional oven) or 160° Celsius (fan-forced oven). Grease and line a square 21 cm cake tin.

Put eggs in large bowl of an electric mixer and beat on medium speed for 5 minutes.

In the meantime, put dates into a microwave safe bowl and cover with cold water. Cover the bowl with a plate or plastic wrap. Microwave on high for 3 minutes. Drain thoroughly and allow to cool a little. Purée until smooth.

Into the bowl with the eggs, sift in the tapioca flour, sorghum flour, brown rice flour, baking powder, cinnamon and psyllium. Add the sugar, carrots, dates, 1 ½ tbs honey, oil and milk. Mix until well-combined.

Pour mixture into cake tin. Bake for 55 mintutes or until a skewer, when inserted, comes out clean. Allow to cool in tin.

To make the icing, put ricotta cheese and honey into bowl of an electric mixer and beat on high for 2 minutes. Scrape the sides of the bowl to make sure the honey is evenly dispersed. Add the icing mixture and milk and beat until well-combined. Once cake is completely cooled, remove from tin and spread icing evenly over the cake.

Cut into 5 cm x 3 cm slices to serve.

Makes approximately 20 slices.


Gluten-free Recipe: Italian Style Cornbread

6 Aug

Italian style cornbread

Woop de doop! I’ve stumbled onto something here!

I am just a wee bit of excited about this recipe, especially after lacking inspiration for savoury fare for some time now.

My family loved this cornbread and when I offered it to a friend and her daughter to try, they also loved it. Nothing better than a thumbs up from someone outside the family! The oil gives this slice a lovely crisp crust and the yoghurt makes it moist on the inside. Try stopping at one piece!

When I first attempted it, I used a good quality basil pesto. It tasted amazing, but then I realised that the pesto contained almonds so it couldn’t be sent to school. I couldn’t find a nut-free pesto, so instead used a basil paste and gluten-free garlic salt. (It’s winter here in Australia, so basil is not in season. You could make your own paste, though, by pounding fresh basil leaves and a little olive oil in a mortar and pestle. Or simply use a blender).

If you can find a nut-free pesto, or if nuts aren’t an issue, I’d recommend using 55 grams of basil pesto instead of the basil paste and garlic salt. Otherwise, follow the recipe below and prepare to receive the accolades from all and sundry.

This cornbread is a great option for lunchtime, especially because the yoghurt and cheese really ups the protein content. Send it in the lunchbox with some vegetable sticks and sliced cold meat for a well-balanced lunch.

Enjoy!

Ingredients

100 g fine polenta (uncooked)

30 g tapioca flour

40 g brown rice flour

30 g sorghum flour

5 g psyllium husk

20 g baking powder

50 g grated parmesan cheese, plus 30 g grated parmesan cheese for topping

2 eggs, lightly beaten

200 g plain Greek yoghurt

125 ml oil

40 g basil paste

1½ tsp gluten-free garlic salt

65 g drained and finely chopped sundried tomatoes

Method

Preheat oven to 180° Celsius (conventional oven) or 160° Celsius (fan-forced oven). Grease and line 18 x 28 cm slice tray.

Put polenta in a large bowl and then sift in tapioca flour, brown rice flour, sorghum flour, psyllium husk and baking powder. Stir to combine.

Add 50 g parmesan cheese, eggs, yoghurt, oil, basil paste, garlic salt and sundried tomatoes.

Mix until well combined.

Pour mixture into slice tray. Spread out and smooth over until evenly covering the tray. Sprinkle over remaining 30 g parmesan cheese.

Put in oven and bake for 35 minutes or until a skewer, when inserted, comes out clean.

Allow to cool in tray.

When completely cool, slice into 4 x 4 cm squares.

Makes approximately 28 squares.

Gluten-free Recipe: Basic Banana Muffins

21 Jul

Basic banana muffins

This is a bit of a hit ‘n’ run post as there’s a few things in the works, mainly the inaugural Gluten-Free Expo in Adelaide this weekend. I’m doing two cooking demonstrations and guest speaking so there’s a bit to organise, but I’m excited to have this opportunity and I’ll be blogging about it next week.

Thankfully, the kids are back at school after 2 weeks of holidays – phew! We all needed the break, but the July holidays are always the most difficult – deep winter means there’s not much opportunity to get outside. We spent a few days in Port Elliot on South Australia’s beautiful Fleurieu Peninsula. It was great to get away, but the cold winds coming off the ocean were something else! It was a good excuse to keep the heaters on.

This recipe is a variation of my Banana Choc Muffin recipe, which my kids absolutely love. It’s great to have a basic banana muffin recipe, though. You can muck around with the flavours by adding coconut, apricot, berries, or basically whatever tickles your fancy.

I love cooking with banana – it’s a bit of a wonder ingredient in gluten-free baking. Not only does it add loads of moisture to your baked goods, it also gives cakes and muffins a really strong and springy texture. If you’re tired of dry and crumbly cakes and muffins, add some banana and marvel at the improvement!

I don’t know why this is so, but this post by Gluten-free Girl suggests that bananas (and green ones in particular) are high in starch. Given that starch is so important in gluten-free baking, maybe that’s why.

Gluten-free Girl’s post has fuelled my interest in banana flour and its possibilities and I can’t wait to get my hands on some. Stay tuned for some recipes!

I cook big batches of these muffins, as they freeze and defrost really well. My kids and their friends love them and yesterday I sent them to school and kindy in the lunchboxes for a recess-time refuel. No leftovers = win for Mum!

Enjoy!

Ingredients

2 eggs

50 g tapioca flour

70 g sorghum flour

60 g brown rice flour

20 g baking powder

1 tsp ground cinnamon

5 g psyllium husk

110 g brown sugar

350 g peeled ripe bananas (approximately 3 or 4), mashed

125 ml oil

125 ml milk

1 tsp vanilla essence

Method

Preheat oven to 180° Celsius (conventional oven) or 160° Celsius (fan-forced oven). Grease and line 12 cavities in a half-cup (125ml) capacity muffin tray.

Beat eggs in the large bowl of an electric mixer on medium speed for 5 minutes. Sift in the tapioca flour, sorghum flour, brown rice flour, baking powder, cinnamon and psyllium husk. Add brown sugar, bananas, oil, milk and vanilla essence. Mix until well combined.

Spoon mixture into cavities until each cavity is approximately three-quarters full.

Bake for 30 minutes.

Makes 12.

Gluten-free Recipe: Chocolate Apricot Slice

14 Jul

Choc apricot slice 1


If at first you don’t succeed …

And so that’s been the way over the last few months as I’ve been trying to get the base of this recipe right – something close to a lovely short biscuit base but not quite so crumbly.

I was able to roadtest it on my book group last week. There was a unanimous thumbs up so at last it’s ready for you as well.

This recipe is quite low in sugar. The base has added sugar but the middle layer is just puréed apricots, and the chocolate layer is guilt-free with no added fructose. So the kids will think it’s a sweet treat but you’re not overloading them with sugar. Continue reading

Gluten-free Cold Rolls

9 Jul

cold rolls

Well, I know it’s blindingly obvious. I mean, Vietnamese cold rolls are a brilliant lunchbox solution. They’re compact, easy to manage, nutritious and tasty. But geez, they take a bit of effort in preparation and rolling. And who’s got that kind of time in the mornings? I sure don’t.

So I’ve avoided cold rolls ever since I started this blog.

But recently, my daughter’s class had a cultural shared lunch at her school. It was a great idea, especially because there are around 70 different nationalities represented in the student body. No one is likely to be teased for the weird food in their lunchbox (remember that scene in My Big Fat Greek Wedding?), because there would be such a huge variety of lunchbox fare amongst all of those cultures.

Anyway, this left me in a bit of a bind – I had no way of knowing whether any of the shared food would be gluten-free and even if it was, there would be no vouching for its preparation or the possibility of cross-contamination. So I sent my daughter with her own lunchbox full of food from different countries. There was pizza (Italy), potato tortillas (Spain – recipe in my eCookbook), gluten-free Anzac biscuits and lamingtons (Australia) and, finally, cold rolls.

I made the rolls the night before with grated carrot, cucumber, some vermicelli noodles and some cold cooked chicken breast. All my kids got cold rolls in their lunchboxes the next day, and it took ages to prepare the ingredients and roll them. But it was worth it, because all 3 kids loved them and there were no leftovers.

So it got me thinking. There must be a quicker way to prepare them so that they can make more frequent appearances in the lunchboxes. Then I had this idea.

Make the chicken dish for the evening meal the night before. It’s fairly simple – lean chicken mince, grated veggies and vermicelli noodles that have been soaked and softened. Set some aside and when the kids are finally in bed, use it to make your cold rolls. Add some iceberg lettuce for a bit of crunch and there you have it! Lunch with a fraction of the preparation.

It will still take a bit more time to prepare these rolls, but they are brilliant for carbohydrates, protein and fibre. All bases covered. And if your kids are like mine, they will love them.

I’ve used this combination of chicken, vegetables and sauce before for my Chicken Rice Balls recipe which you’ll find in my eCookbook. It’s even quicker and simpler than the cold rolls and again uses the leftovers from the evening meal.

Enjoy!

[su_button url=”http://www.glutenfreelunchboxes.com/shop” target=”blank” style=”3d” background=”#d94773″ color=”#fefefe” size=”7″ center=”yes” radius=”round”]Buy eCookbook Now[/su_button]

Cold Rolls

Ingredients

10 small sheets rice paper

1 cup Chicken and Vegetable Noodles (see recipe below) at room temperature

30 g shredded iceberg lettuce

Gluten-free Vietnamese dipping sauce (optional)

Method

Put a sheet of rice paper into a large bowl of hot water for about 10 seconds (time will vary depending on the temperature of the water). Remove when rice paper has softened.

Spread rice paper on a clean, dry tea towel and then turn the rice paper over and spread it out on the tea towel again to remove excess water.

In the centre of the paper, place a few strands of the lettuce and approximately 2 tsp of the Chicken and Vegetable Noodles. Fold two opposite sides of the paper towards each other so that they cover the noodle mix. Starting from one of the remaining open ends, roll up into a firm parcel.

Repeat with remaining ingredients.

Serve in lunchboxes or on a platter with Vietnamese dipping sauce (optional).

Makes approximately 10 rolls.

Chicken and Vegetable Noodles

Ingredients

2 tsp oil

500 g lean chicken mince

1 onion, peeled, trimmed and finely diced

2 large carrots, peeled and trimmed

1 large zucchini, trimmed

100 g mushrooms

2 tbs gluten-free soy sauce

125 g vermicelli rice noodles

Method

Heat wok or large frypan on high heat. Add oil and then add chicken mince and onion.

Cook for approximately 10 minutes, until onion is translucent and chicken is almost cooked through. Stir as you go, breaking up the chicken into small chunks.

In the meantime, grate the carrots, zucchini and mushrooms. Add them to the chicken mix. Stir.

Soak the noodles in a large bowl of boiling water for 5 minutes or until soft. Drain thoroughly. Using kitchen scissors, snip noodles into short strands.

Once the vegetables have softened a little, add soy sauce and noodles. Stir to combine. Cook for a further two minutes, or until chicken is thoroughly cooked through.

Reserve 1 cup of mixture for cold rolls.

Serve immediately.

Serves 4-5 people.


Gluten-free Chicken Noodle Soup

16 Jun

chicken noodle soup

It’s winter here and it’s time to think about warming comfort lunches. There’s nothing worse than soggy sandwiches on a cold day, and nothing better than a warming thermos of soup.

I’m a big fan of chicken noodle soup, so it was only a matter of time before I got around to blogging my own recipe. Also, I’ve needed a quick post for this week as I hurt my back a couple of weeks ago and haven’t been able to stand in the kitchen for very long, which has severely limited my time for inventing. That’s what you get for being virtuous and going to the gym!

You can tell from the photo that I haven’t had time for anything – it’s pretty ordinary, but then again soup is a tricky thing to photograph. Best left to the professionals!

My favourite way of preparing the chicken is to put chicken breasts in the slow cooker, cover with water, and then let them cook on low for six hours or so. They shred like a dream, and you can cook extra to have some top quality cold meat on hand. But if you don’t have time for that, I’ve given you a quick method for poaching the chicken.

Once your chicken’s cooked, the rest is easy to put together. My kids love this soup – it’s great for a quick, light meal and easy to put the leftovers into a thermos for the next day’s lunch.

Enjoy!

Ingredients

1 lean chicken breast fillet

300 g fresh or frozen corn kernels

80 g Pad Thai rice noodles

1 litre good quality gluten-free chicken stock

1 tsp gluten-free Chinese five spice

Salt and pepper to taste

2 tbs greens of sliced sping onions, to garnish (optional)

Method

Halve the chicken breast through the middle, as if to butterfly, but cut it into two separate pieces. Put pieces into a small saucepan and cover with water. Bring to the boil over high heat and allow to boil for 10 minutes.

When chicken is cooked, remove from water and set aside to cool a little. Discard the water. Shred chicken with a fork.

In the meantime, put corn kernels into a microwave safe bowl and cover with boiling water. Cover bowl with a plate or plastic film and microwave on high for 3 minutes. Drain well and purée.

In a large bowl, soak noodles in boiling water for 5 minutes. Drain thoroughly and roughly snip noodles with kitchen scissors.

Put chicken stock into a medium sized saucepan and bring to boil over high heat. Add chicken, corn, noodles, Chinese five spice and salt and pepper to taste. Stir until all ingredients are warmed through.

Serve immediately, garnished with spring onion.

Makes 6 small serves.


Gluten-free blueberry orange and cinnamon muffins

9 Jun

2015-06-04 14.45.07

I did it! By George, I really did it!

Yup, it’s a good day when you get to quote Henry Higgins from My Fair Lady. Even better because … ta-da! … At last I can bring you this recipe.

You may recall that a few weeks ago I posted a recipe for Cake Balls, which was basically a guide to salvaging a baking disaster. You know, the cake that sank, or was too dry, or charred, or in my case, crumbled into smithereens at the slightest touch. Take the edible bits of the cake, muffin, biscuits or slice, process into crumbs and turn them into cake balls. Continue reading

Gluten-free Hummus Damper Bites

25 May

Hummus Damper Bites

Well, this recipe has had me stumped for quite some time. I originally imagined it as some lovely damper mini-loaves made with crushed chickpeas, tahini and garlic salt. They were going to be just fantastic … except that they didn’t actually work.

So I tinkered for a while, but got sick of the stockpile of crumbling mini-loaves so I gave it away.

But it has niggled at me, because the idea should have worked, damn it.

I’ve had my fair share of disasters just recently – another recipe I’d been working on for a long time was a failure again and again so I turned the remnants into Cake Balls. I have to say, the good thing about the failure is that I worked out how to salvage something out of it. Always a bonus when the ingredients are just a wee bit expensive!

I eventually came back to this recipe, determined to get it working and decided to use a store-bought hummus instead of chickpeas and tahini. The thing is, the recipe was looking more and more involved and further away from the original concept of easy lunchbox baking.

So I recommend using a good quality, gluten-free, store-bought hummus, unless you regularly keep the homemade variety in your fridge. Homemade hummus is certainly on my to-do list- my kids love it and I’m sure they would dive headfirst into a vat of the stuff given half a chance.

But here’s the really big news – I’ve realised that there is a wonder miracle ingredient for gluten-free baking, and it works like a charm in this recipe. It’s an easy to find, common ingredient. Yoghurt. Yes, that’s right. Plain Greek yoghurt.

It’s amazing the way it locks moisture into a cake or muffin and the less fruit or vegetables you use in your baked goods, the more you will need something else to keep things moist and spongy. Yoghurt is it. I don’t know why it works better than cream, for example, but it does. I’ll have to conduct my own scientific enquiry into this. One day. One day when I also have time to watch TV without folding the washing, one day when I have time to paint my toenails and apply moisturiser to my legs….. Oh, wait. Off track and too much information.

Anyway, these little bites could easily be a savoury recess time snack, but I’ve been packing them for lunch, along with some cooked chicken breast and vegetable sticks. And they freeze and defrost like a dream. And most importantly, the kids love ’em.

Enjoy!

Ingredients

2 eggs

60 g tapioca flour

80 g brown rice flour

80 g sorghum flour

5 g psyllium husk

15 g baking powder

1 tsp gluten-free garlic salt

135 g gluten-free store-bought hummus

125 ml oil

140 g plain Greek yoghurt

70 ml milk

Method

Preheat oven to 180° Celsius (conventional oven) or 160° Celsius (fan-forced oven). Grease and line 24 cavities in a 25 ml capacity mini-muffin tray.

Beat eggs in the large bowl of an electric mixer, on medium speed for 5 minutes.

Sift into the bowl the tapioca flour, brown rice flour, sorghum flour, psyllium husk, baking powder and ½ teaspoon of the garlic salt. Add the hummus, oil, yoghurt and milk. Mix until well-combined.

Spoon mixture into cavities until three-quarters full. Sprinkle a little of the remaining garlic salt over each Bite.

Bake for 20 minutes.

Makes 24.